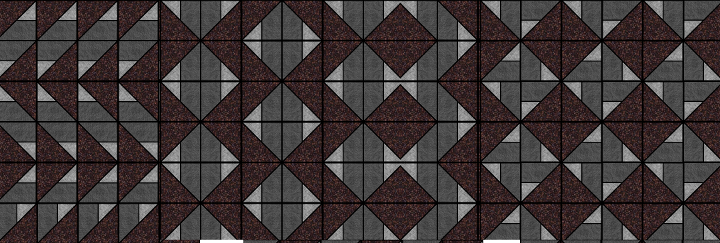
The block patterns used in quilts are a great example of a pattern with repeating symmetry. Using a computer to play with these repeating symmetry patterns is a great way to design quilts.
I've written a plug-in for a image editing program called GIMP.
GIMP is an acronym for GNU Image Manipulation Program. It is a freely distributed program for such tasks as photo retouching, image composition and image authoring.
It has many capabilities. It can be used as a simple paint program, an expert quality photo retouching program, an online batch processing system, a mass production image renderer, an image format converter, etc.
GIMP is expandable and extensible. It is designed to be augmented with plug-ins and extensions to do just about anything. The advanced scripting interface allows everything from the simplest task to the most complex image manipulation procedures to be easily scripted.
GIMP is written and developed under X11 on UNIX platforms. But basically the same code also runs on MS Windows and Mac OS X.
The plug-in I've written is called Symmetry Tile and instructions on downloading and installing it can be found here.
This plug-in takes the selection from an image ("cell") and produces a new image according to one of the 17 plane symmetry groups. These are also known as wallpaper groups or plane crystallographic groups.
Basically it rotates and or flips copies of the cell, combines them to form a tile and then copies that tile to fill a new image.
Some galleries of images produced with this plug-in can be found here.
This post gives some examples of how you might use Symmetry Tile for quilt design. It presumes you're familiar with the basics of using GIMP, but should be able to be followed by someone who has used similar programs such as Photoshop or Photopaint.
The basic block element of the design.
Create a new image from the file menu. Start off fairly small say 200 x 200 pixels. We're going to end up with lots of copies of this across the screen, and there's not a lot of point in working at very high resolution.
Turn on the grid and 'snap to grid' from the edit menu. Choose the pencil from the toolbox and set it to maybe 1 or 2 pixels in size.
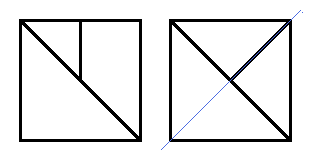
Draw a square 120 X 120 pixels, and then some straight lines inside to make the seam lines on a basic block. You'll make more different patterns if your basic block is non-symmetric. The block on the left is non-symmetric. The block on the right would look the same if it was flipped or mirrored about the dotted blue line.
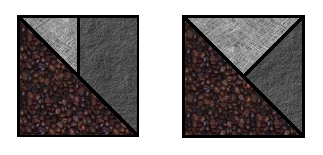
Use the fill tool (bucket) to fill each piece with a colour or pattern. Once coloured in a symmetric block can become non-symmetric. The block on the right with the coloured fill, no longer looks the same if it is flipped or mirrored.
Playing with symmetry
Use the rectangular select tool to select the block. Find the Symmetry Tile Plug-in under Render on the Filters menu.
Choose the image size to be a multiple of the block size, say 720 x 720 pixels. Choose one of the symmetry groups and click OK to see the result. Experiment with different symmetry groups to see what they do. For the complete effect choose all square cells from the Symmetry Groups menu and set Multiple images to Yes. Your screen should fill up with 32 images (they may all be hiding under the top image).
If you used the original cell, I used above, then amongst all those images will be some familiar to traditional quilters.
Pinwheels
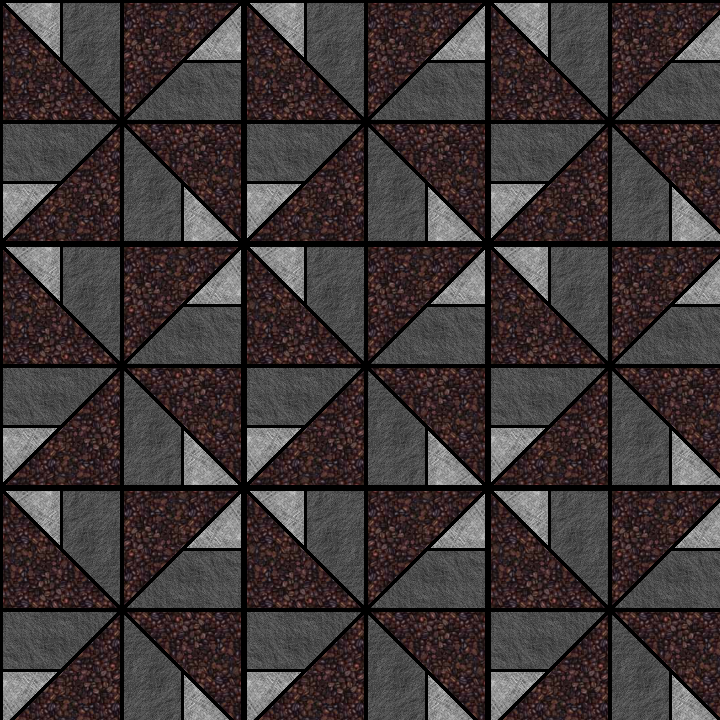
Flying Geese
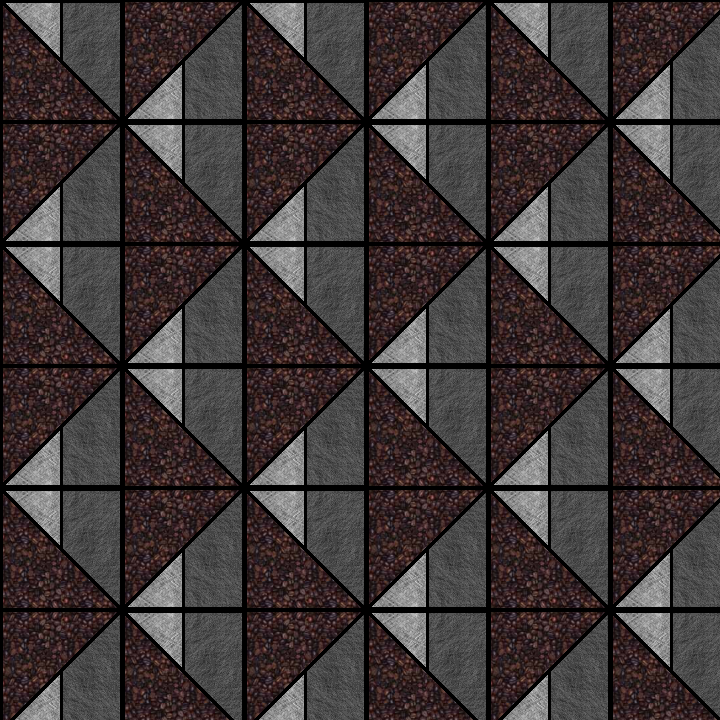
Double Zigzag
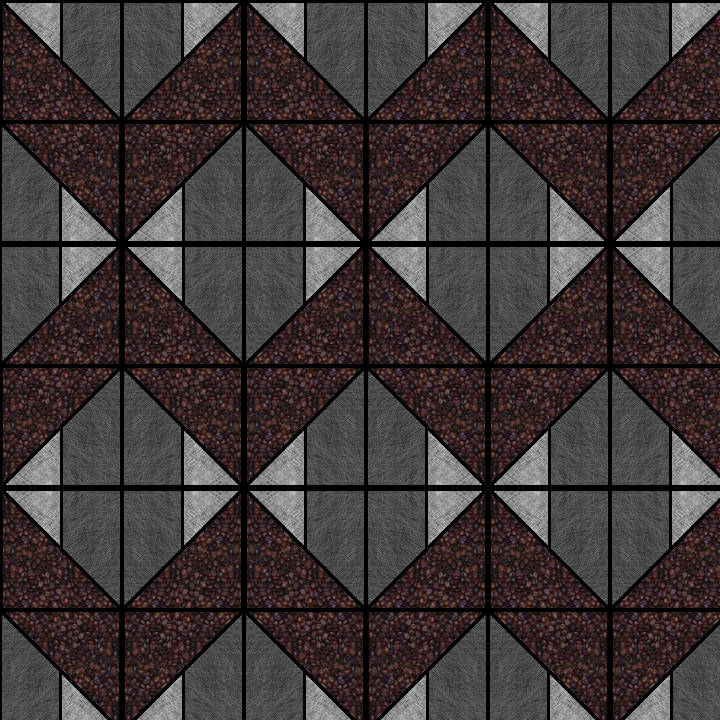
Hourglass
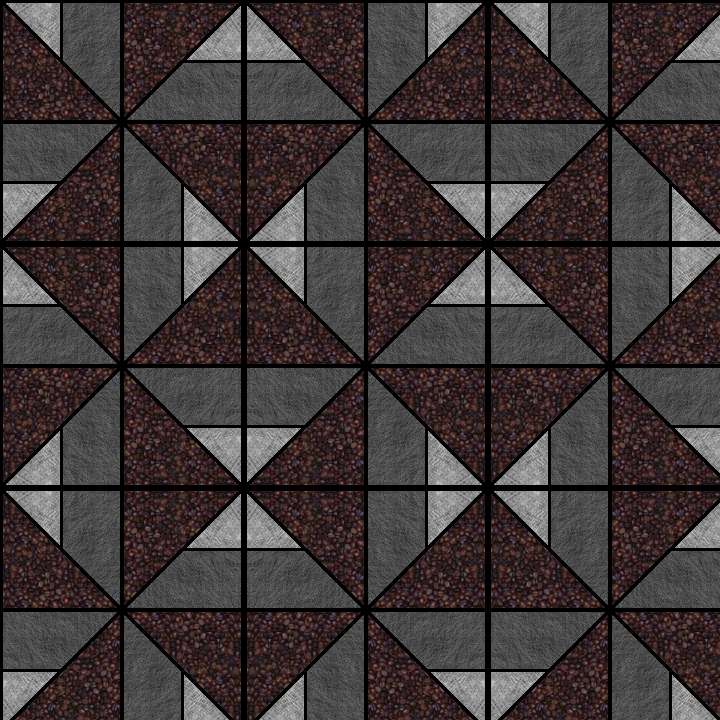
Where you go from here is up to you. A sampler quilt with a selection of these design separated by borders is one possibility.
I next opened a new much larger image and copied then pasted as layer some of the designs I liked the look of. With each designed as a separate layer they can be moved around and under each other until a potential quilt design is arrived at. The design below has about 5 different patterns arranged so the design morphs from one pattern to the next. It takes a little bit of time to catch on that only one basic block is used to achieve the different patterns.
